

Hey there! As a supplier of sandwich panel mineral wool, I'm super excited to walk you through the installation process of interior sandwich panel mineral wool. It's a pretty straightforward process once you get the hang of it, and I'll break it down step by step.
Pre - installation Preparation
Before you even start thinking about putting up those sandwich panels, there are a few things you gotta take care of. First off, you need to make sure the installation site is clean and free of any debris. Any dirt or dust can mess up the adhesion and the overall stability of the panels.
Measure the area where you're going to install the panels. This is crucial because you need to know exactly how many panels you'll need. You don't want to end up short or with a whole bunch of extra panels. Also, check the dimensions of the panels you've got. Make sure they match up with the space you've measured.
Gather all the tools you'll need. You'll definitely need a measuring tape, a saw (if you need to cut the panels to size), a drill, screws, and some sealant. Having all these tools ready will make the installation go a lot smoother.
Handling and Storage of Sandwich Panels
Once you've got your panels, handle them with care. These panels are made of mineral wool, which is a great insulator but can be a bit fragile if not handled properly. When you're moving them around, lift them from the edges and try not to bend or twist them.
Store the panels in a dry place. Mineral wool can absorb moisture, and if it gets wet, it can lose its insulating properties. Keep them off the ground and cover them with a tarp if possible. This will protect them from the elements until you're ready to install them.
Installation Steps
Step 1: Mark the Layout
Use your measuring tape and a chalk line to mark where the panels will go on the wall or ceiling. This will give you a clear guide and help you keep the panels straight and evenly spaced. Make sure the marks are level and square. You can use a spirit level to check this.
Step 2: Install the First Panel
Start by installing the first panel at one corner. Line it up with the marks you made earlier. Use a drill to make holes in the panel and then insert screws to attach it to the wall or ceiling. Make sure the screws are tight but don't overtighten them, as this can damage the panel.
Step 3: Join the Panels
Once the first panel is in place, it's time to join the next one. There are usually special joints on the edges of the panels that fit together. Slide the second panel into place next to the first one, making sure the joints are properly aligned. You can use some sealant along the joints to make them airtight.
Step 4: Continue Installation
Keep repeating steps 2 and 3 until you've covered the entire area. If you need to cut a panel to fit a particular space, use a saw. Make sure to wear safety goggles and a dust mask when cutting the panels, as the mineral wool can produce dust.
Step 5: Finishing Touches
After all the panels are installed, check for any gaps or uneven areas. You can use more sealant to fill in the gaps and make the installation look neat. Also, make sure all the screws are tight and the panels are firmly attached.
Advantages of Using Interior Sandwich Panel Mineral Wool
There are several reasons why interior sandwich panel mineral wool is a great choice. First of all, it's an excellent insulator. It can keep your indoor space warm in the winter and cool in the summer, which can save you a lot of money on energy bills.
It's also fire - resistant. Mineral wool has a high melting point, which means it can help prevent the spread of fire in case of an emergency. Check out our Fire Resistance Rock Wool Mineral Wool Sandwich Panel for more details on its fire - resistant properties.
Another advantage is its sound - insulating properties. Mineral wool can absorb sound waves, which can reduce noise levels inside your building. This is especially useful in places like offices, hospitals, and schools.
Different Types of Sandwich Panels We Offer
We also offer a variety of other sandwich panels. For example, our Fire Rated Rock Wool Sandwich Panel Mineral Wool with PIR Side Sealing has an extra layer of PIR side sealing, which makes it even more airtight and energy - efficient.
Our Insulated Metal PIR PU Foam Sandwich Panel is another great option. It combines the insulation properties of PIR and PU foam with a metal outer layer, which makes it strong and durable.

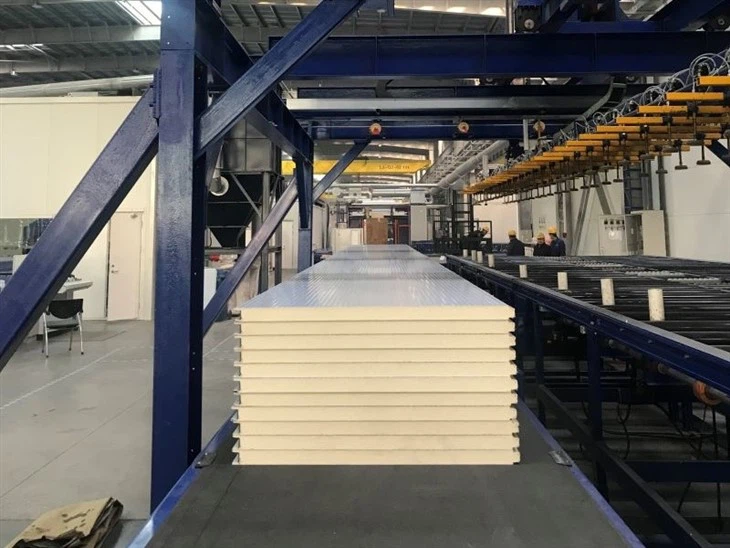
Maintenance of Interior Sandwich Panel Mineral Wool
Maintaining your interior sandwich panel mineral wool is pretty easy. Regularly check the panels for any signs of damage, such as cracks or loose joints. If you find any damage, repair it as soon as possible. You can use sealant to fix small cracks and replace any damaged panels if necessary.
Keep the panels clean by wiping them down with a damp cloth. Avoid using harsh chemicals, as they can damage the mineral wool. This will help keep your panels looking good and performing well for a long time.
Why Choose Us as Your Supplier
As a supplier of sandwich panel mineral wool, we have a lot to offer. We've been in the business for a long time, and we know what it takes to provide high - quality products. Our panels are made with the best materials and are tested to meet all the industry standards.
We offer competitive prices without compromising on quality. We also have a great customer service team that can help you with any questions or concerns you might have. Whether you're a contractor, a builder, or a homeowner, we can provide you with the right panels for your project.
Contact Us for Purchasing
If you're interested in purchasing our sandwich panel mineral wool or any of our other products, we'd love to hear from you. Contact us to start a conversation about your project. We can help you choose the right panels, give you a quote, and provide you with all the information you need. Don't hesitate to reach out, and let's work together to make your project a success.
References
- Building Materials Handbook, 2023 Edition
- Insulation Best Practices Guide, published by the Construction Industry Council